Ray Tracing Renderer [New!]
In this tutorial, you will learn the following:
Use ray tracing in
SapienRenderer
The full script can be downloaded from rt.py, rt_mat.py.
Ray tracing vs. rasterization
In the previous tutorials, we have learned how to set up a basic scene with SAPIEN and acquire rendering results under the default settings using SapienRenderer. By default, SapienRenderer uses a high-efficiency rasterization-based rendering pipeline, making it suitable for data-intensive tasks such as reinforcement learning.
However, though fast, the rasterization-based renderer is not physically-grounded, and cannot faithfully model many real-world effects, e.g., indirect lighting, realistic shadows, reflections and refractions, making the results overly flat and lack realism. On the other end, ray tracing renderer simulates how light rays interact with objects in a physically correct manner, and produces images that can be indistinguishable from those captured by a camera.
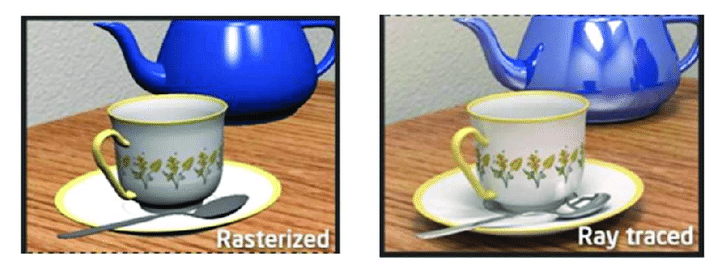
From A Shader-Based Ray Tracing Engine, Park et al.
Ray tracing with SAPIEN
In SAPIEN 2.2, the default renderer SapienRenderer (formerly known as
VulkanRenderer) supports both rasterization and ray tracing, and different
cameras can use differet rendering pipelines. Choosing a pipeline is done
through specifying a shader pack, which is a directory containing a collection
of glsl files.
To use the ray-tracing pipeline, simply add the following lines before creating a camera or a viewer.
    sapien.render_config.camera_shader_dir = "rt"
    sapien.render_config.viewer_shader_dir = "rt"
That’s it! You can now rerun the script with raytracing renderer. The result would look like:
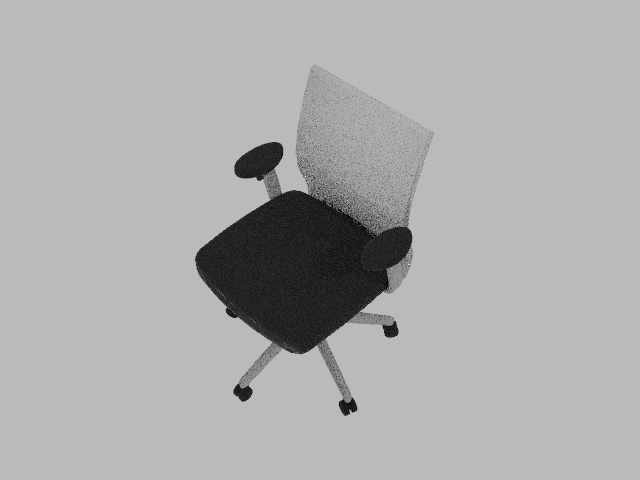
You may find that the result looks more realistic with the ray tracing shader.
However the result contains noise due to under-sampling. To reduce the noise,
one way is to increase the sample-per-pixel for the renderer. To achieve this,
simply change the rt_samples_per_pixel in render_config.
sapien.render_config.rt_samples_per_pixel = 4 # change to 256 for less noise
Increasing the spp will affect the rendering speed directly. A cheaper way to reduce the noise is using a denoiser. SapienRenderer supports the OptiX denoiser on NVIDIA RTX GPUs.
sapien.render_config.rt_use_denoiser = False # change to True for OptiX denoiser
Note
You are required to have an NVIDIA RTX GPU with driver version >= 522 installed to use the denoiser.
While you may get the denoiser to work on drivers of lower versions (it has worked on 470 in one of our tests), it is not officially supported.
Reflection and refraction
Ray tracing allows SAPIEN to render realistic reflection and refractions.
We will create a scene in SAPIEN and render with ray tracing turned on and off. First, let’s setup the environment:
    engine = sapien.Engine()
    engine.set_log_level('warning')

    if ray_tracing:
        sapien.render_config.camera_shader_dir = "rt"
        sapien.render_config.viewer_shader_dir = "rt"
        sapien.render_config.rt_samples_per_pixel = 64
        sapien.render_config.rt_use_denoiser = True

    renderer = sapien.SapienRenderer()

    engine.set_renderer(renderer)

    scene_config = sapien.SceneConfig()
    scene = engine.create_scene(scene_config)

    camera_mount = scene.create_actor_builder().build_kinematic()
    camera = scene.add_mounted_camera(
        name="camera",
        actor=camera_mount,
        pose=sapien.Pose(),  # relative to the mounted actor
        width=1280,
        height=720,
        fovy=np.deg2rad(45),
        near=0.1,
        far=100,
    )

    camera_mount.set_pose(
        Pose([-0.28, -0.28, 0.46], [0.8876263, -0.135299, 0.3266407, 0.2951603]))

    ground_material = renderer.create_material()
    ground_material.base_color = np.array([202, 164, 114, 256]) / 256
    ground_material.specular = 0.5
    scene.add_ground(0, render_material=ground_material)
    scene.set_timestep(1 / 240)

    scene.set_ambient_light([0.3, 0.3, 0.3])
    scene.add_directional_light([0, 0.5, -1], color=[3.0, 3.0, 3.0],
                                shadow=True, scale=2.0, shadow_map_size=4096  # these are only needed for rasterization
                                )
We add a flag ray_tracing to allow switching between rasterization and ray
tracing. Next, let’s build the scene. First, we create a rough bluish sphere:
    builder = scene.create_actor_builder()
    material = renderer.create_material()
    material.base_color = [0.2, 0.2, 0.8, 1.0]
    material.roughness = 0.5
    material.metallic = 0.0
    builder.add_sphere_visual(radius=0.06, material=material)
    builder.add_sphere_collision(radius=0.06)
    sphere1 = builder.build()
    sphere1.set_pose(Pose(p=[-0.05, 0.05, 0.06]))
Next, we create a rough transparent sphere:
    builder = scene.create_actor_builder()
    material = renderer.create_material()
    material.ior = 1.2
    material.transmission = 1.0
    material.base_color = [1.0, 1.0, 1.0, 1.0]
    material.roughness = 0.15
    material.metallic = 0.0
    builder.add_sphere_visual(radius=0.07, material=material)
    builder.add_sphere_collision(radius=0.07)
    sphere2 = builder.build()
    sphere2.set_pose(Pose(p=[0.05, -0.05, 0.07]))
Generally, setting a large transmission value will lead to a transparent material. Similarly, we can add a capsule and a box with complex materials:
    builder = scene.create_actor_builder()
    material = renderer.create_material()
    material.base_color = [0.8, 0.7, 0.1, 1.0]
    material.roughness = 0.01
    material.metallic = 1.0
    builder.add_capsule_visual(radius=0.02, half_length=0.1, material=material)
    builder.add_capsule_collision(radius=0.02, half_length=0.1)
    cap = builder.build()
    cap.set_pose(Pose(p=[0.15, -0.01, 0.01], q=transforms3d.euler.euler2quat(0, 0, -0.7)))

    builder = scene.create_actor_builder()
    material = renderer.create_material()
    material.base_color = [0.8, 0.2, 0.2, 1.0]
    material.roughness = 0.005
    material.metallic = 1.0
    builder.add_box_visual(half_size=[0.09, 0.09, 0.09], material=material)
    builder.add_box_collision(half_size=[0.09, 0.09, 0.09])
    box = builder.build()
    box.set_pose(Pose(p=[0.05, 0.17, 0.09]))
Finally, let’s load an external mesh and assign a highly metallic material to that object:
    builder = scene.create_actor_builder()
    material = renderer.create_material()
    material.base_color = [0.9, 0.6, 0.5, 1.0]
    material.roughness = 0.0
    material.metallic = 1.0
    builder.add_visual_from_file(
        '../assets/objects/suzanne.dae', scale=[0.1, 0.1, 0.1], material=material)
After building the scene, we can get rendering results from the camera:
    scene.step()
    scene.update_render()
    camera.take_picture()

    rgb = camera.get_color_rgba()
    rgb = im.fromarray((rgb * 255).astype(np.uint8))
    rgb.save(f'mat_{"rt" if ray_tracing else "rast"}.png')
    rgb.show()
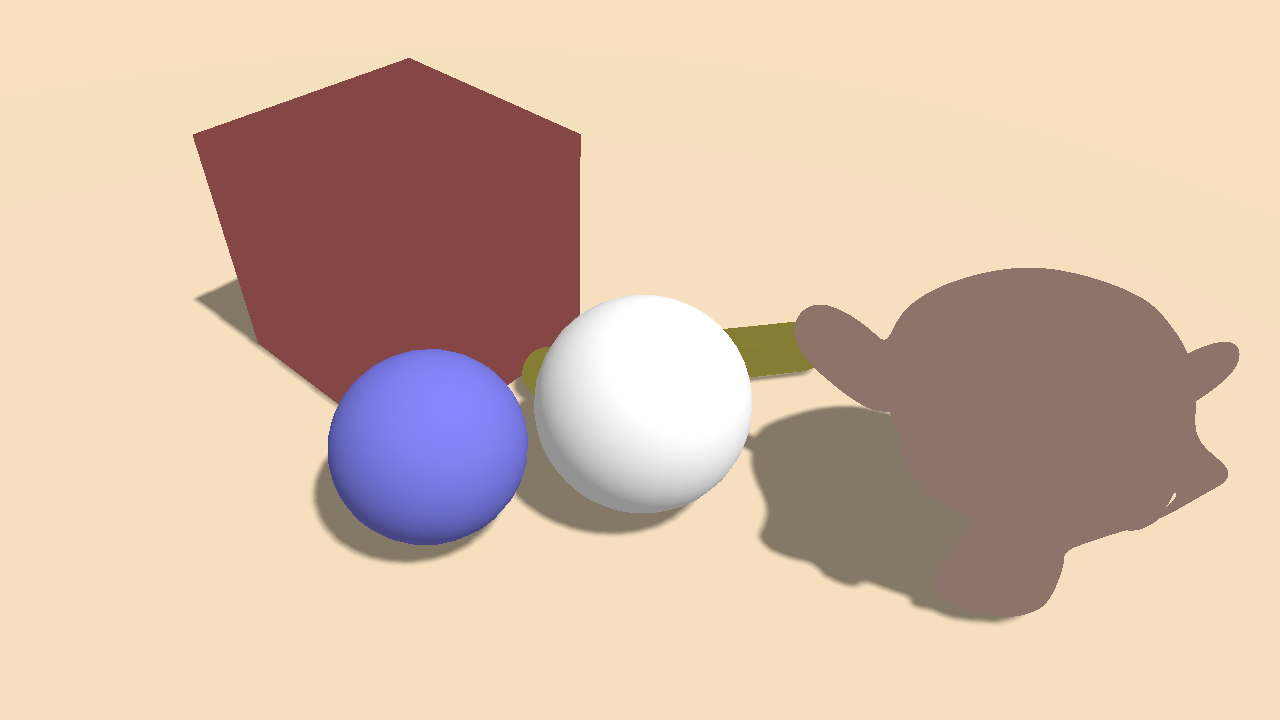
Result with default rasterizer
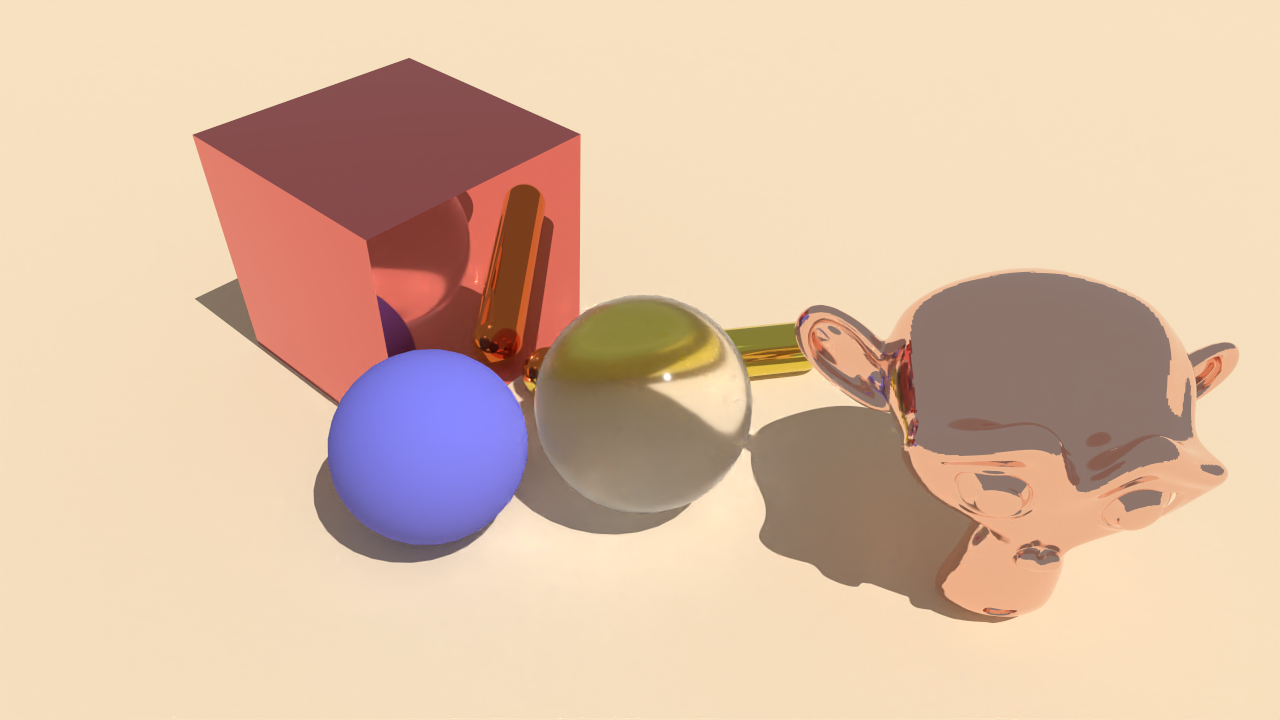
Result with ray tracer