SAPIEN Realistic Depth [New!]
In this tutorial, you will learn the following:
Simulating realistic depth with
StereoDepthSensor
The full script can be downloaded from rt_stereodepth.py
Note
You are required to have an NVIDIA GPU with 6.0 <= compute capability <= 8.6 to use StereoDepthSensor. For users without available NVIDIA
GPU, there is an alternative implementation named ActiveLightSensor that can run on CPU. Note that ActiveLightSensor will produce slightly
different results compared to StereoDepthSensor and will be much slower. Usage of StereoDepthSensor is always recommended when an NVIDIA
GPU is available.
Sim-to-real gap
Simulation is a powerful tool for developing and testing computer vision/robotic algorithms, but there is often a significant gap between the performance
of the algorithms in simulation and its performance in the real world. This is known as the sim-to-real gap. Among different types of input of real-world
oriented algorithms, depth is one of the most important type of data that has extensive use. It is found that using depth data from simulated depth sensor as
input can improve sim-to-real performance by a large margin compared to using ground truth depth [1]. Inspired by this, SAPIEN is integrated with a real-time
active stereo sensor simulation pipeline that will produce depth similar to real-world depth sensors. This tutorial will guide you through the process of using
StereoDepthSensor to generate SAPIEN Realistic Depth and apply it to your system.
Realistic depth sensor simulation
Let’s see an example of generating SAPIEN Realistic Depth with StereoDepthSensor. First of all, we need to import the class we will be using, and set
up our renderer and scene:
from sapien.core import Pose
from sapien.sensor import StereoDepthSensor, StereoDepthSensorConfig
    sim = sapien.Engine()

    renderer = sapien.SapienRenderer()
    sim.set_renderer(renderer)
    sapien.render_config.camera_shader_dir = "rt"
    sapien.render_config.rt_samples_per_pixel = 32
    sapien.render_config.rt_max_path_depth = 8
    sapien.render_config.rt_use_denoiser = True

    scene = build_scene(sim, renderer)
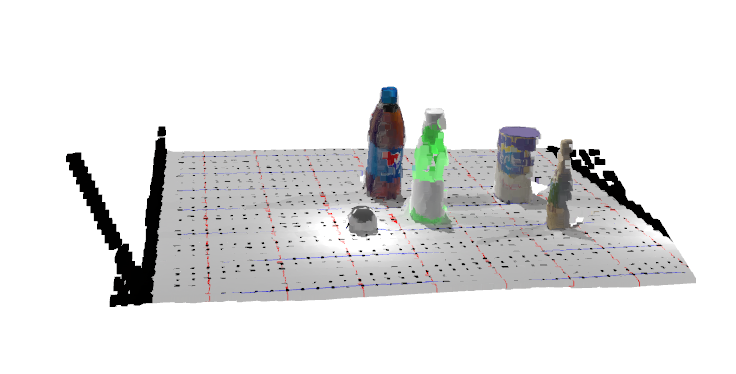
We will be using ray-tracing renderer in this section. While StereoDepthSensor also supports rasterization renderer, using ray-tracing renderer can
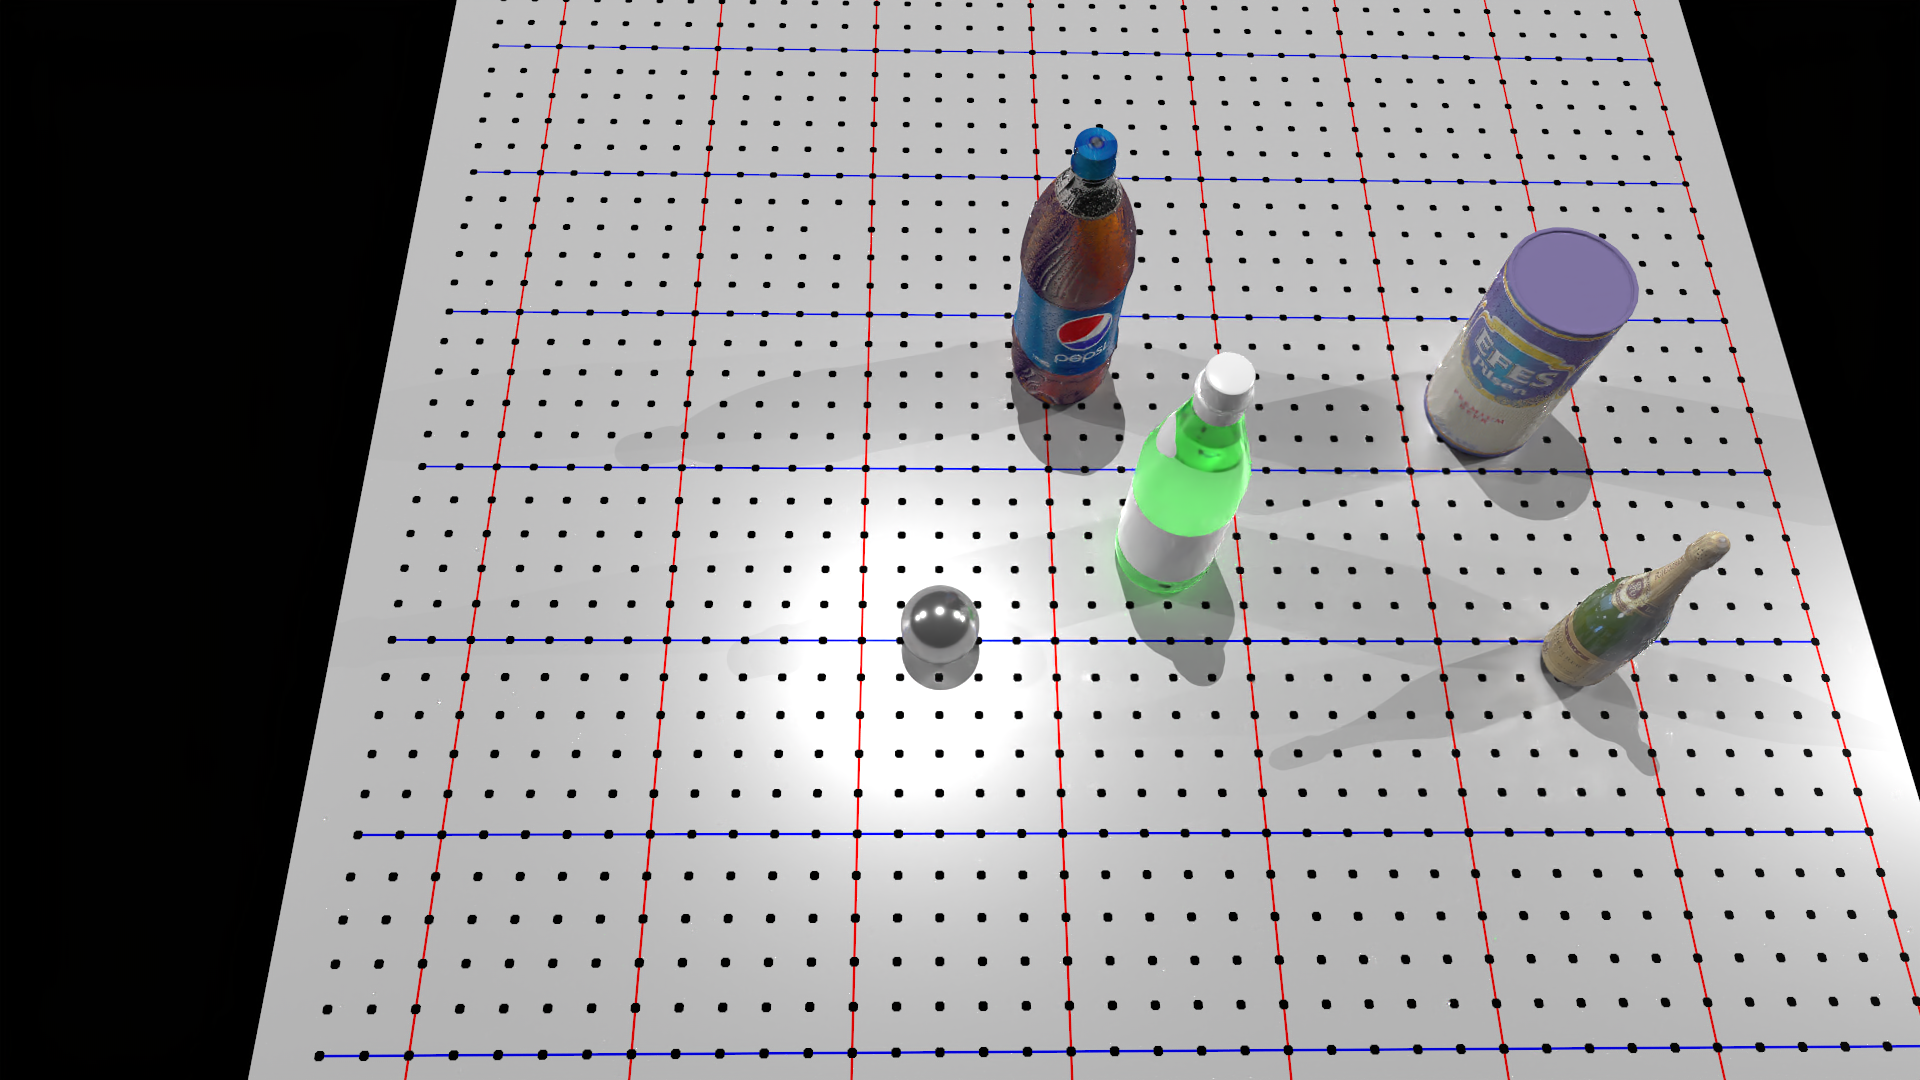
give us more realistic results. The scene we will be using is a simulated scene aligned to the following real scene:

You can find the detailed code of build_scene in the full script.
Now, let’s add a StereoDepthSensor to the scene:
sensor_config = StereoDepthSensorConfig()
sensor = StereoDepthSensor('sensor', scene, sensor_config)
StereoDepthSensor supports a large number of configurable parameters to maximize its flexibility of simulating different sensors. For more information,
Please check the API doc for class StereoDepthSensorConfig.
Optionally, you can mount the sensor to an existing actor:
sensor_config = StereoDepthSensorConfig()
sensor = StereoDepthSensor('sensor', scene, sensor_config, mount=actor, pose=Pose()) # pose is relative to mount
After mounting to an actor, the sensor will move along with it. Calling sensor.set_local_pose can adjust the relative pose to the mounted actor.
sensor behaves very similar to a camera. You can set_pose (or set_local_pose when mounted) and take_picture just like working with a camera.
In addtion to these basic functions, you can compute_depth and get_pointcloud on the sensor:
    sensor.set_pose(Pose([-0.13732728, 0.13584249, 0.82386769], [0.84667092, -0.01287458, 0.53195302, -0.00292851]))

    scene.step()
    scene.update_render()
    sensor.take_picture()
    sensor.compute_depth()
One important difference between camera and sensor is that while camera will only take picture of an RGB image, sensor will take another pair
of infrared images, which will be used to compute depth. After calling take_picture, the RGB image and infrared images will be saved within sensor.
Calling sensor.get_rgb and sensor.get_ir will return the pictures in ndarray form. Let’s take a look at them:
Simulated RGB image from sensor.
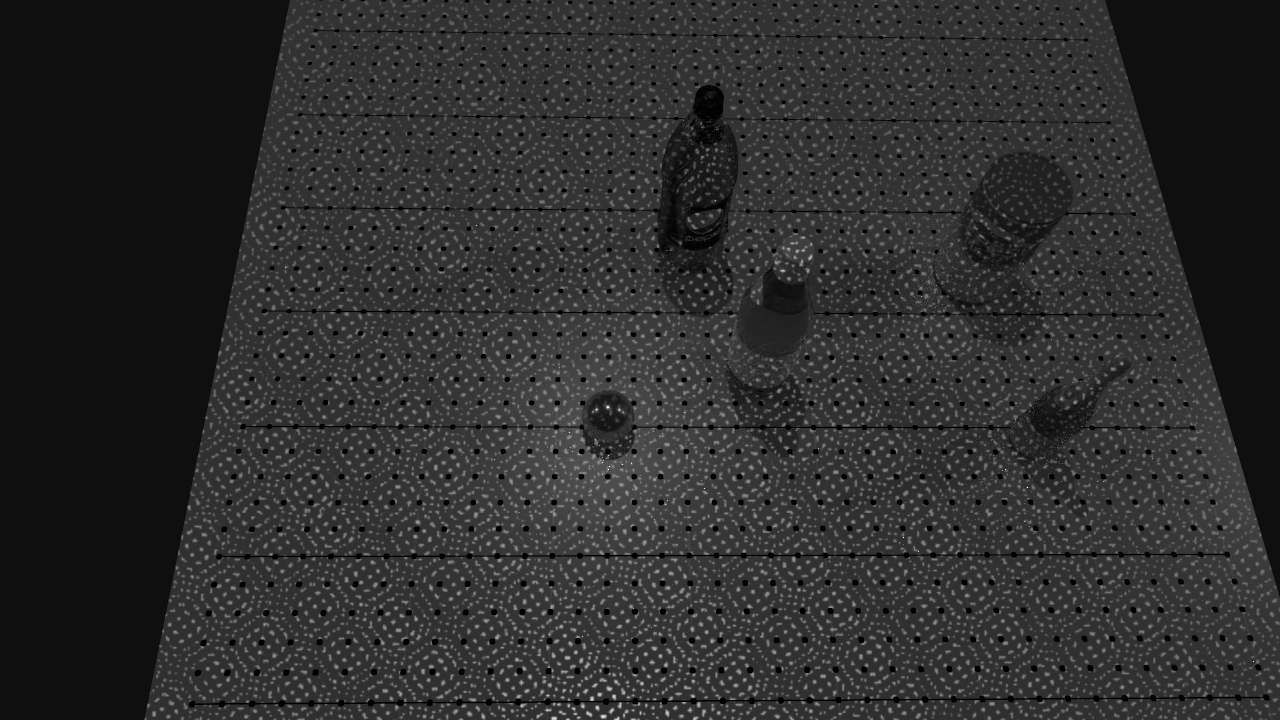
One of the simulated infrared images from sensor.
Calling compute_depth after take_picture will generate the depth map and save it within sensor. Similarly, we can get the computed depth ndarray by
calling sensor.get_depth. Let’s compare our simulated depth with depth generated by real-world depth sensor:
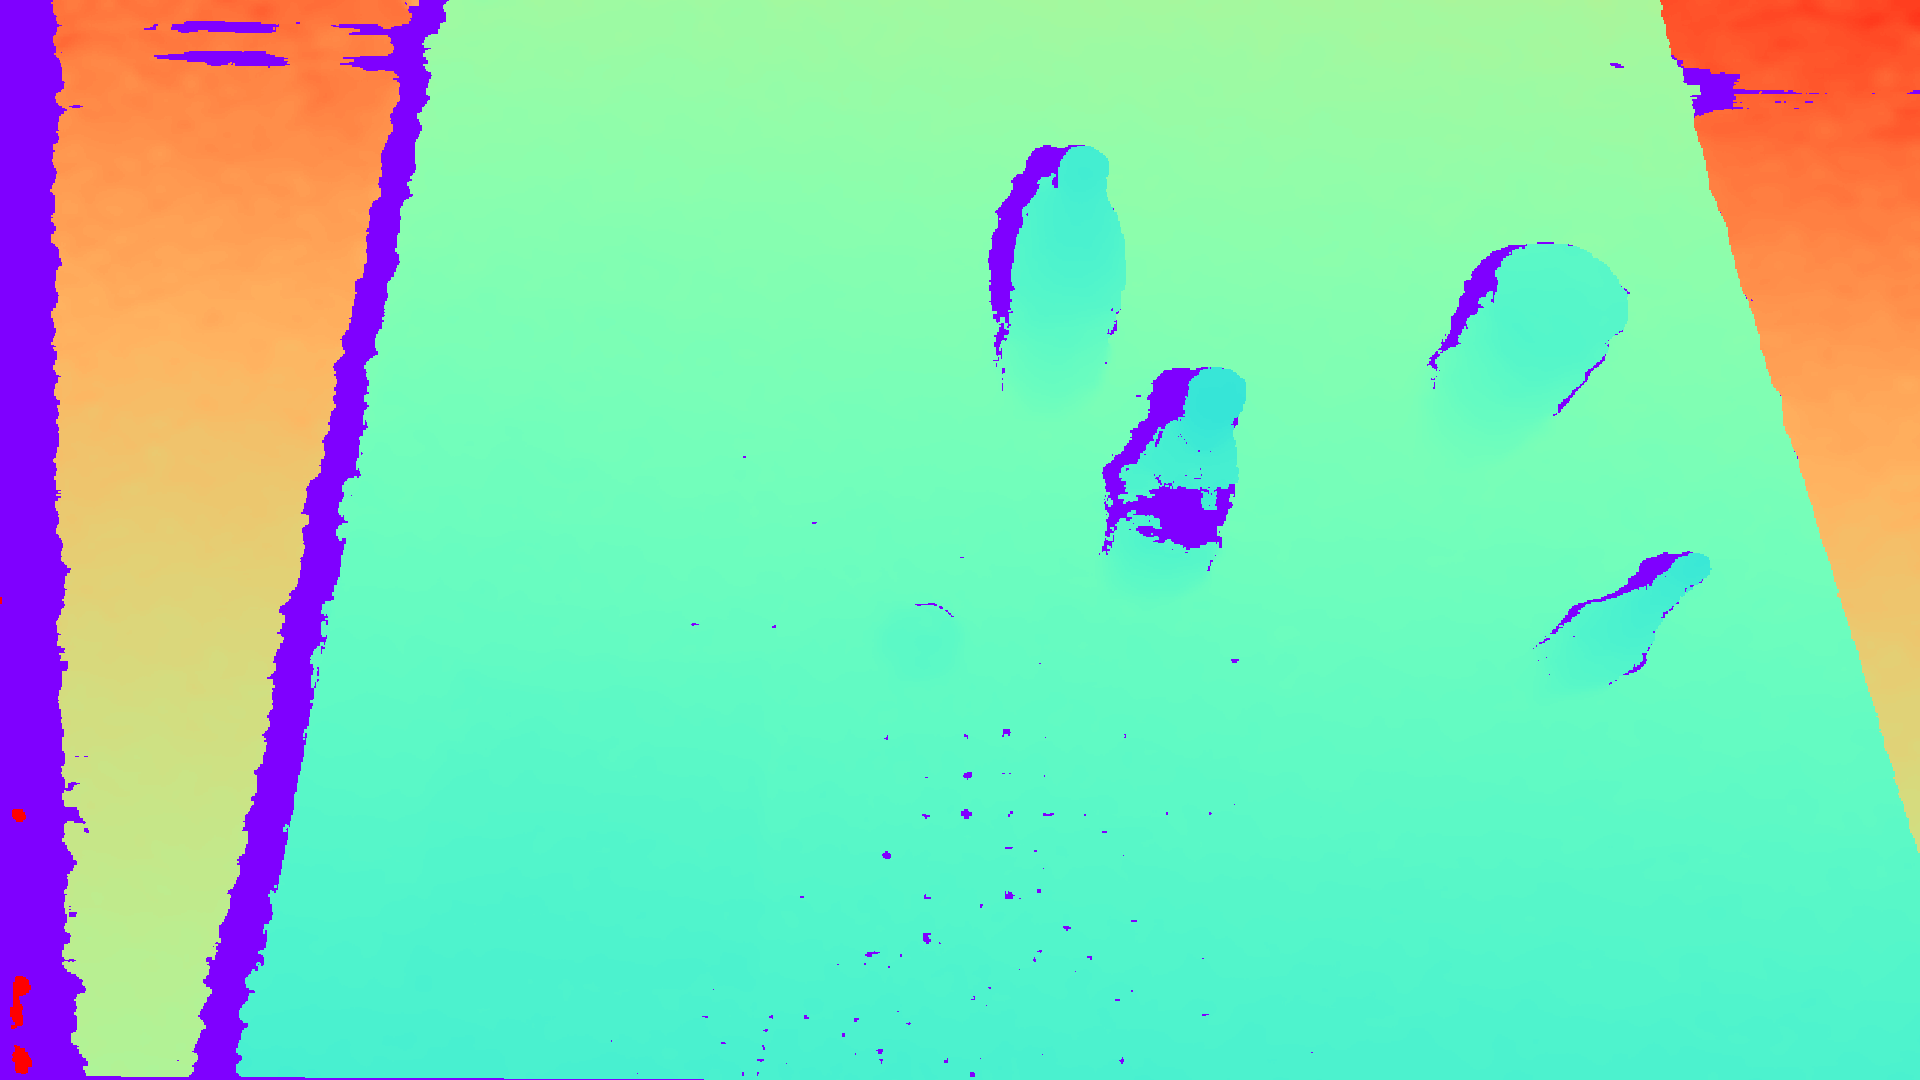
Depth map generated by real-world depth sensor.
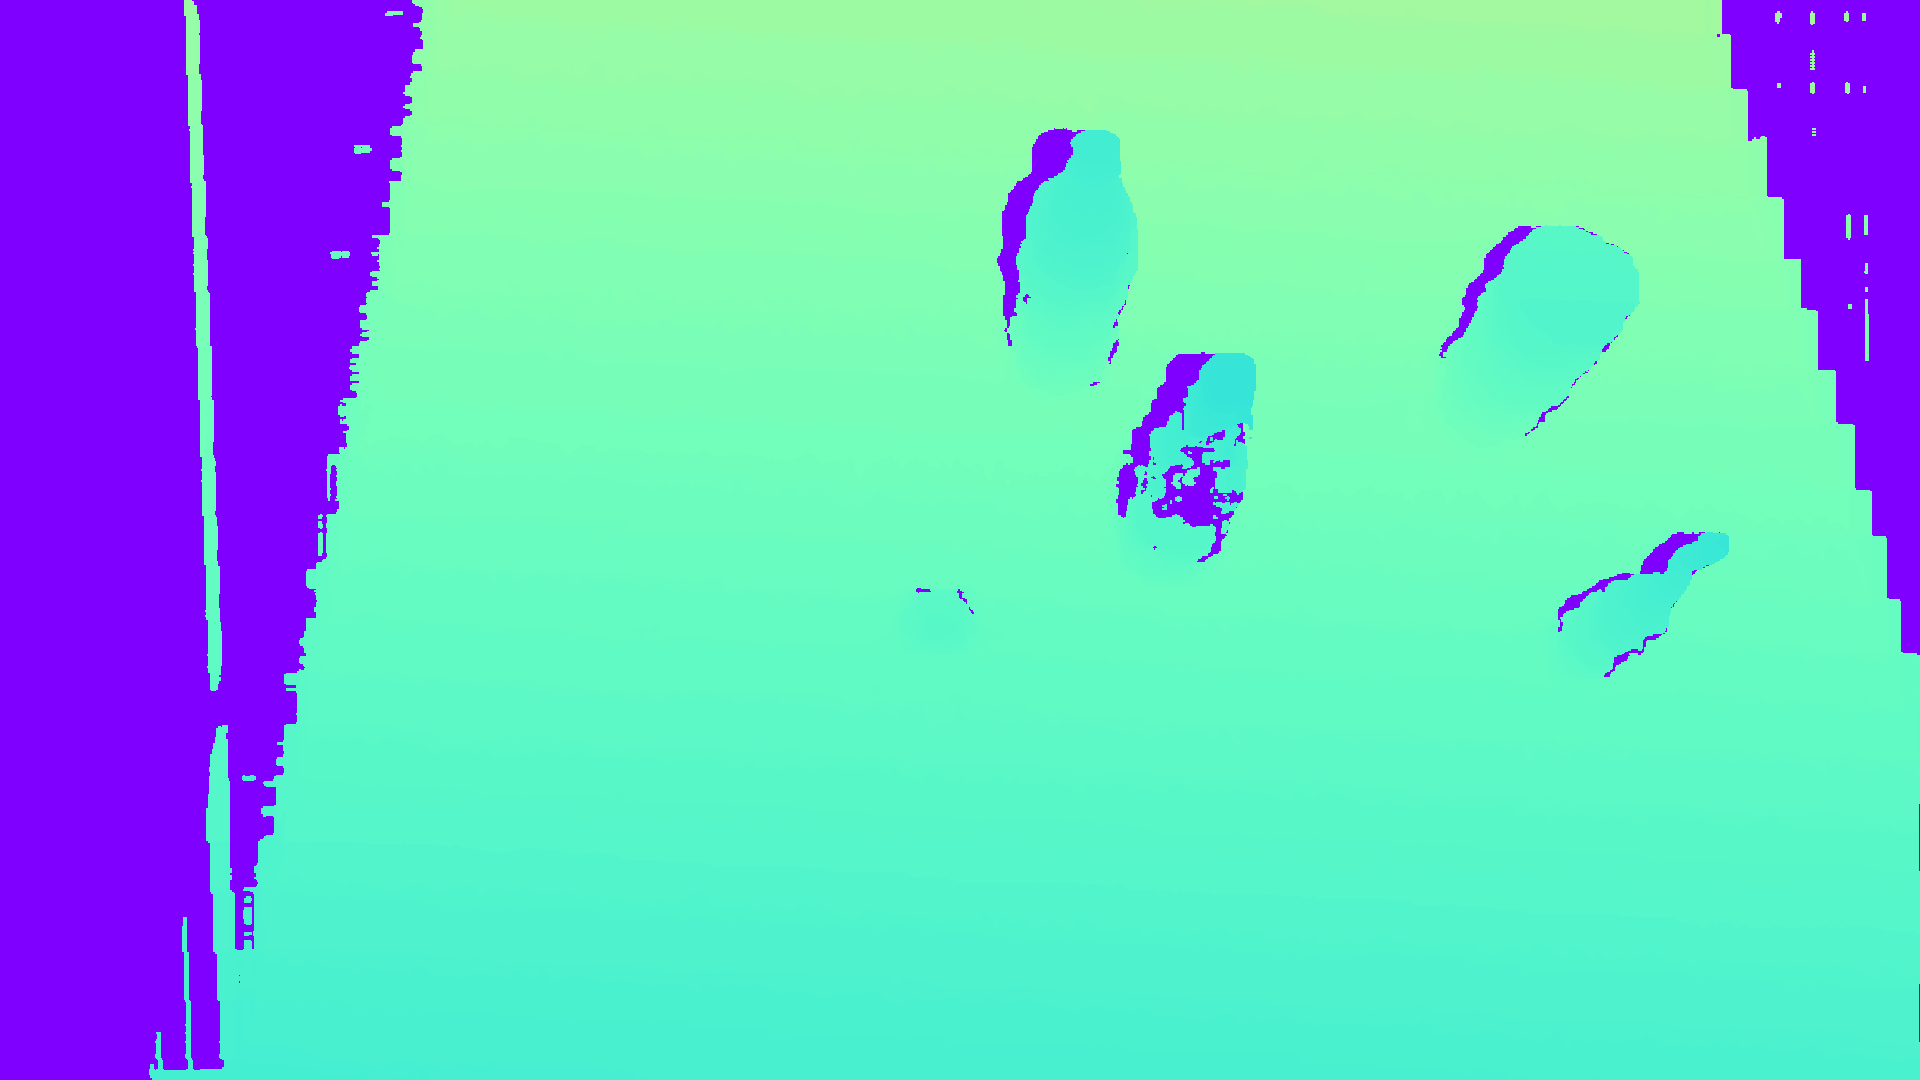
SAPIEN Realistic Depth generated by sensor.
Note
The final depth map will be transformed into RGB camera frame, which means that it will have the same resolution and frame as of the RGB camera. This allows easy integration of RGBD image or RGB point cloud.
Finally, you can easily get a point cloud by calling sensor.get_pointcloud. You can choose if you want to fuse the pointcloud into a RGB point cloud ([x, y, z, r, g, b])
by specifying with_rgb. Let’s visualize the point cloud with Open3D:
    pc = sensor.get_pointcloud(with_rgb=True) # From RGB camera's view with x rightward, y downward, z forward
    pcd = o3d.geometry.PointCloud(o3d.utility.Vector3dVector(pc[..., :3] * np.array([1, -1, -1]))) # Change axis direction for easier view
    pcd.colors = o3d.utility.Vector3dVector(pc[..., 3:])
    o3d.visualization.draw_geometries([pcd])
RGB point cloud restored from SAPIEN Realistic Depth.
Note
The point cloud will be from RGB camera’s view, with x-axis rightward, y-axis downward, and z-axis forward.
Boosting simulation speed
The entire depth simulation pipeline in SAPIEN has been highly-optimized on GPU. It is possible to achieve real-time (60+ FPS) performance with SteroDepthSensor under
certain resolution. Let’s see a few tricks that can further boost the speed of StereoDepthSensor.
If depth is the only needed data and RGB data is not needed, you can specify infrared_only when calling take_picture:
sensor.take_picture(infrared_only=True)
This can save the time for rendering RGB image.
As mentioned above, the final depth map generated by StereoDepthSensor will be transformed into RGB camera frame. It will be of the same resolution and frame as of the
RGB camera. This feature can be used to achieve fast downsampling/upsampling. All you need is to specify the rgb_resolution of the StereoDepthSensorConfig as the final
resolution you want to sample on, and StereoDepthSensor will do that for you on the GPU. In this way, you don’t need to attach any slow CPU resampling function to it.
In general, lowering rt_samples_per_pixel for renderer, ir_resolution of sensor config and max_disp of sensor config are all good ways to enhance computation
speed. For example, try changing the rt_samples_per_pixel in our script from 32 to 8. You might find that we can get almost as good results as before while
sensor.take_picture now runs much faster. However, note that these changes generally will have some effect (trade quality with speed) on the output depth map. You can freely
adjust the parameters until you find the settings that satisfies your need.
Seamless transfer to other GPU libraries
StereoDepthSensor can return output in DLPack tensor format. DLPack tensor is a common data format that has been adopted by many popular libraries such as PyTorch
or TensorFlow. Through DLPack, the output depth map or point cloud can be seamlessly transferred into gpu tensors of those libraries without the need of additional
CPU-GPU transfer. This further allows StereoDepthSensor to maximize its speed.
In addition, StereoDepthSensor has a function get_depth_dl_tensor that can return a DLPack tensor. Through DLPack, the output depth map can be seamlessly
transferred into gpu tensors of common deep learning library such as PyTorch and TensorFlow. This can save the time for unnessecary GPU-to-CPU transfer. For example,
directly creating a PyTorch GPU tensor from StereoDepthSensor is as simple as one line:
For example, directly passing the generated depth map from StereoDepthSensor to PyTorch without CPU-GPU transfer is as simple as two lines:
depth_dl = sensor.get_depth_dl_tensor()
depth_tensor = torch.utils.dlpack.from_dlpack(depth_dl).clone()
This also works for transferring point cloud:
pointcloud_dl = sensor.get_pointcloud_dl_tensor()
pointcloud_tensor = torch.utils.dlpack.from_dlpack(pointcloud_dl).clone()
Reference
[1] Zhang, X., Chen, R., Li, A., Xiang, F., Qin, Y., Gu, J., Ling, Z., Liu, M., Zeng, P., Han, S., Huang, Z., Mu, T., Xu, J., & Su, H. (2023). Close the Optical Sensing Domain Gap by Physics-Grounded Active Stereo Sensor Simulation. IEEE Transactions on Robotics, 1–19. https://doi.org/10.1109/TRO.2023.3235591